To keep track the date and time an image is captured, 2500 has a built-in clock and timer. This clock and timer is run by a rechargeable battery in the camera which is different from the battery for running the camera operations. This "hidden" rechargeable battery is charged when the camera has a battery in the battery chamber. However, this "hidden" rechargeable battery has no power when (1) you receive the camera and (2) you store the camera for a long period of time without a battery in the battery chamber (and hence the "hidden" rechargeable battery consumes all of its power). Should one of these two conditions happen, the camera does not have correct date and time. In this case, a blinking clock icon will be shown in the upper-right corner of the LCD monitor when the camera is in the shooting mode. See the image below. So, when you see a blinking clock, it is the time to setup a correct date and time!
|
|
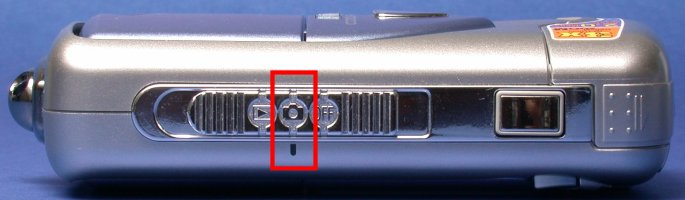
Date and time can only be changed in the shooting mode. More precisely, the mode selector must be slid to the middle position (i.e., the camera icon) as shown below:
However, before the mode selector is slid to the shooting mode, the lens section must be rotated (below left) until the non-slip grip is visible (below right).

|

|
If the lens is not rotated until the non-slip grip is shown, the LCD monitor will show you a movie as a warning (below left). Or, for some reason that the lens is rotated back while the camera is in shooting mode, the LCD monitor will show a warning message rather than a movie (below right). Should this happen, rotate the lens until the non-slip grip is visible and the movie or the message will disappear. You should hear a click sound, indicating the camera is ready for photo taking.

|

|
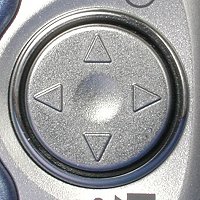
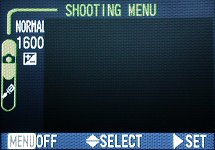
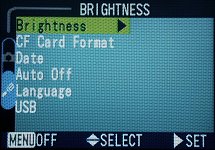
The multi-selector next to the LCD monitor (below left) is used to browse the menu system and make selections. It has four arrows (below right), each of which is used to move a selection cursor in the indicated direction.

|
|
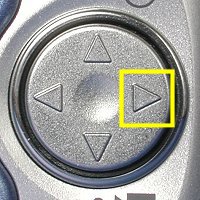
The use of this multi-selector is very simple: use the up and down arrows to browse the menu system (i.e., SELECT) and the right arrow to choose a selected item (i.e., SET).

|
|
| Use the up and down arrows to select | Use the right arrow to set |
Here is the procedure for setting date and time:

|

|
|

|

|

|
To set year, use the up and down arrows. After the desired year appears, press the right arrow to the month field. Again, use the up and down arrows to choose a month and then press the right arrow to the day field. After the month field is set, press the right arrow to highlight the top row (above right). This is for selecting a display style. Use the up and down arrow to cycle through three styles, Y-M-D, D-M-Y and M-D-Y. When the desired style appears, press the right arrow to set. Then, the LCD returns to the Date menu.