Before we can explain how to use Coolpix 2500, we need to know the locations and functions of various buttons. We shall go through each button once with a brief explanation. However, you really do not have to know the meaning and function of each button at the very beginning. So, please just browse the names and know the locations of these buttons. We will revisit each of them later on.
All control buttons of this camera can be found on the top edge and by the LCD monitor of the camera.
There are two sets of controls on the top side of the camera: the Mode Selector and the Shutter-Release Button. See the image below.
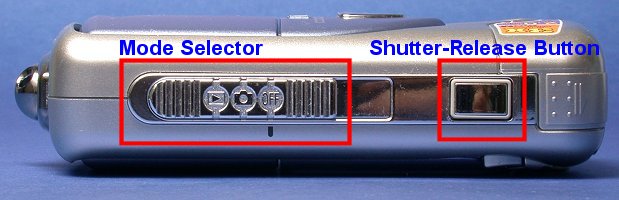
The mode selector is a slide and has three positions: OFF (turning the camera on or off), a camera icon (shooting mode), and a playback icon (playback mode). When the camera is being used for picture taking, it has to be in the shooting mode. The playback position is for reviewing the photos and movies recorded on the memory card. When the camera is not being used, the mode selector should be slid to the OFF position.
The other control on the top side of the camera is the shutter-release button. Half-pressing it forces the camera to focus and press it all the way down to take a photo. These perhaps are the two most commonly used control items.
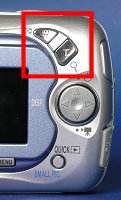
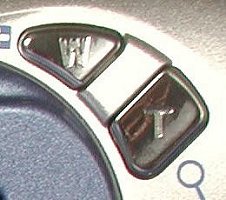
The zoom buttons are in the upper right corner on the back panel as shown below. Most buttons serve a dual purpose, one in the shooting mode and the other in the playback mode. The zoom buttons are no exception. In the shooting mode, they change the focal length of the on-camera lens. Press and/or hold the W - wide (resp., T - tele) button to decrease (resp., increase) the focal length of the lens. In the payback mode, the T button magnifies the image up to 6 times, while the W button is used to select a 2×2 or 3×3 thumbnail display or reset the magnification set by the use of the T button. Click here to learn more.
|
|
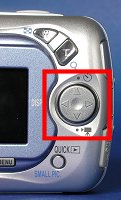
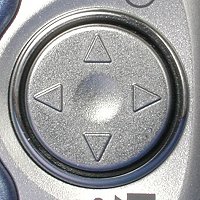
To the right side of the LCD monitor is the multi-selector. See the images below. The multi-selector has four arrows. In the shooting mode, these arrows may be used to activate a short menu system and to select/set a particular item in the menu. In the payback mode, these arrows are used for browsing images on the memory card or for moving to different part of a magnified image.
|
|
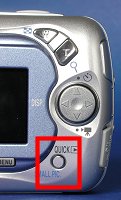
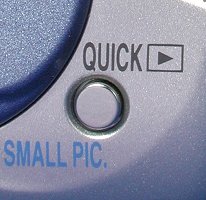
The QUICK button is located in the lower right corner on the back panel. See images below. This button is also referred to as the SMALL PIC. button. In the shooting mode, pressing this button displays the last image taken on the LCD monitor. While in the playback mode, pressing this button creates a smaller 320×240 image in the memory card. This button is very handy in the shooting mode for quick review.
|
|
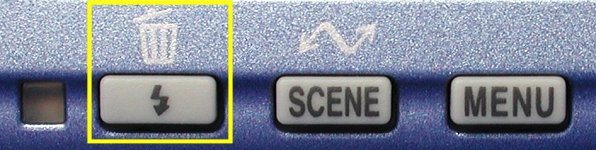
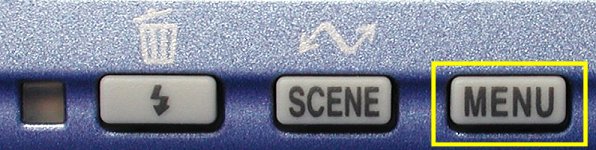
There are three buttons below the LCD monitor. The right one is the MENU button. See the image below. Pressing this button in the shooting (resp., playback) mode brings up the shooting (resp., playback) menu system. Use the multi-selector to browse the menu and make a selection.
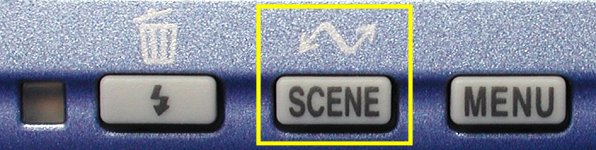
There are three buttons below the LCD monitor. The middle one is the SCENE button. See the image below. In the shooting mode, pressing this button enters the scene menu system from which you can choose one of the 12 scene modes (e.g., portrait, party/indoor, close up, fireworks show and so on). In the playback mode, pressing this button activates the transfer of the selected images to your computer; however, before you can do this, you must install Nikon View that comes with your camera.
There are three buttons below the LCD monitor. The left one is the FLASH button. See the image below. In the shooting mode, pressing this button enters the flash menu system from which you can choose one of the four flash functions. In the playback mode, pressing this button deletes the image you are currently viewing.